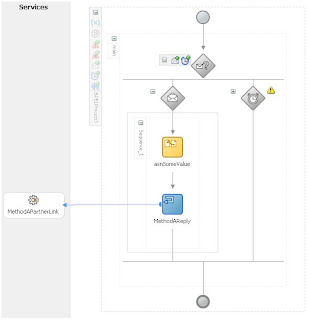
In RIA development we want frequently want to consume web services. From a organizational point of view we typically want related methods to be provided by the same provider. If the web service is being provided via a BPEL process, how can we do that?
The answer is to use a BPEL process with a Pick activity.
Steps:
1) Create a normal synchronous BPEL process. Let the wizard create it's default input and output variables, as these won't be used.
2) Drop your custom input and output XSD files into the
3) Delete the the client partner link. When you do you'll be asked if you want to delete the Partner link -- answer Yes. You'll also be asked if you want to delete the WSDL file -- answer No to this.
4) Drop a Pick activity between the existing Receive and Reply activities. Now delete the Receive and Reply activities.
5) Edit the project WSDL file:
a) In the types section, delete the imports for the default XSD file, and add imports for your custom XSD files
b) Delete the existing messages and create a message for each request and response message you will be defining
c) Delete the existing portType definition. Add a new one, and under the portType add a new operation for each method you are implementing in this BPEL process via the Pick
d) Change the existing partnerLinkType to use your new portType
6) You will need to create an onMessage branch in the Pick for each operation being implemented:
a) Double click the message icon and select the partner link to associate with this message. On the first message you will need to create a new partner link.
b) Create the new input message variable, selecting the desired message type.
c) Select the appropriate operation type. This will bind the partner link message to this message branch.
7) You will need to add a sequence (or a scope/sequence combination) to each message branch and provide the rest of the activities within it.
8) If you are returning multiple return types (most likely), each branch will need a Reply activity at then end of it to return the output to the client.